Host from Home with a Pi
The following guide will show you how to setup a Raspberry Pi at home and host your web projects on that Pi!
You won't have to change any firewall setting, you won't have to login to your router, and you won't have to use any dynamic DNS service. You won't even need to know your public IP address. It will just work. Join us!
Pre-requisites
- A Raspberry Pi (see below for what to buy)
- A free Cloudflare account
- You will need to enter a credit card during the setup, but you will not be charged
- A domain name, either bought through Cloudflare or at a different registrar
- An internet connection (through your home router's wifi or Ethernet connection, or even using a phone's hotspot)
Steps
Raspberry Pi Setup
- Buy a Raspberry Pi
- We recommend getting a Raspberry Pi 5 with 8Gb of RAM, an official power supply, a case, and a microSD card.
- Download the Raspberry Pi Imager to your computer.
- After inserting the microSD card into your computer, open Raspberry Pi Imager and follow these steps:
- pick the Raspberry Pi model that you have (e.g. Raspberry Pi 5)
- under "Operating System", click "Choose OS", then select "Other general-purpose OS", then select "Ubuntu", then select "Ubuntu Server 24.04 LTS (64-bit)"
- under "Storage", click "Choose Storage" and select the microSD card
- the window should look like this:
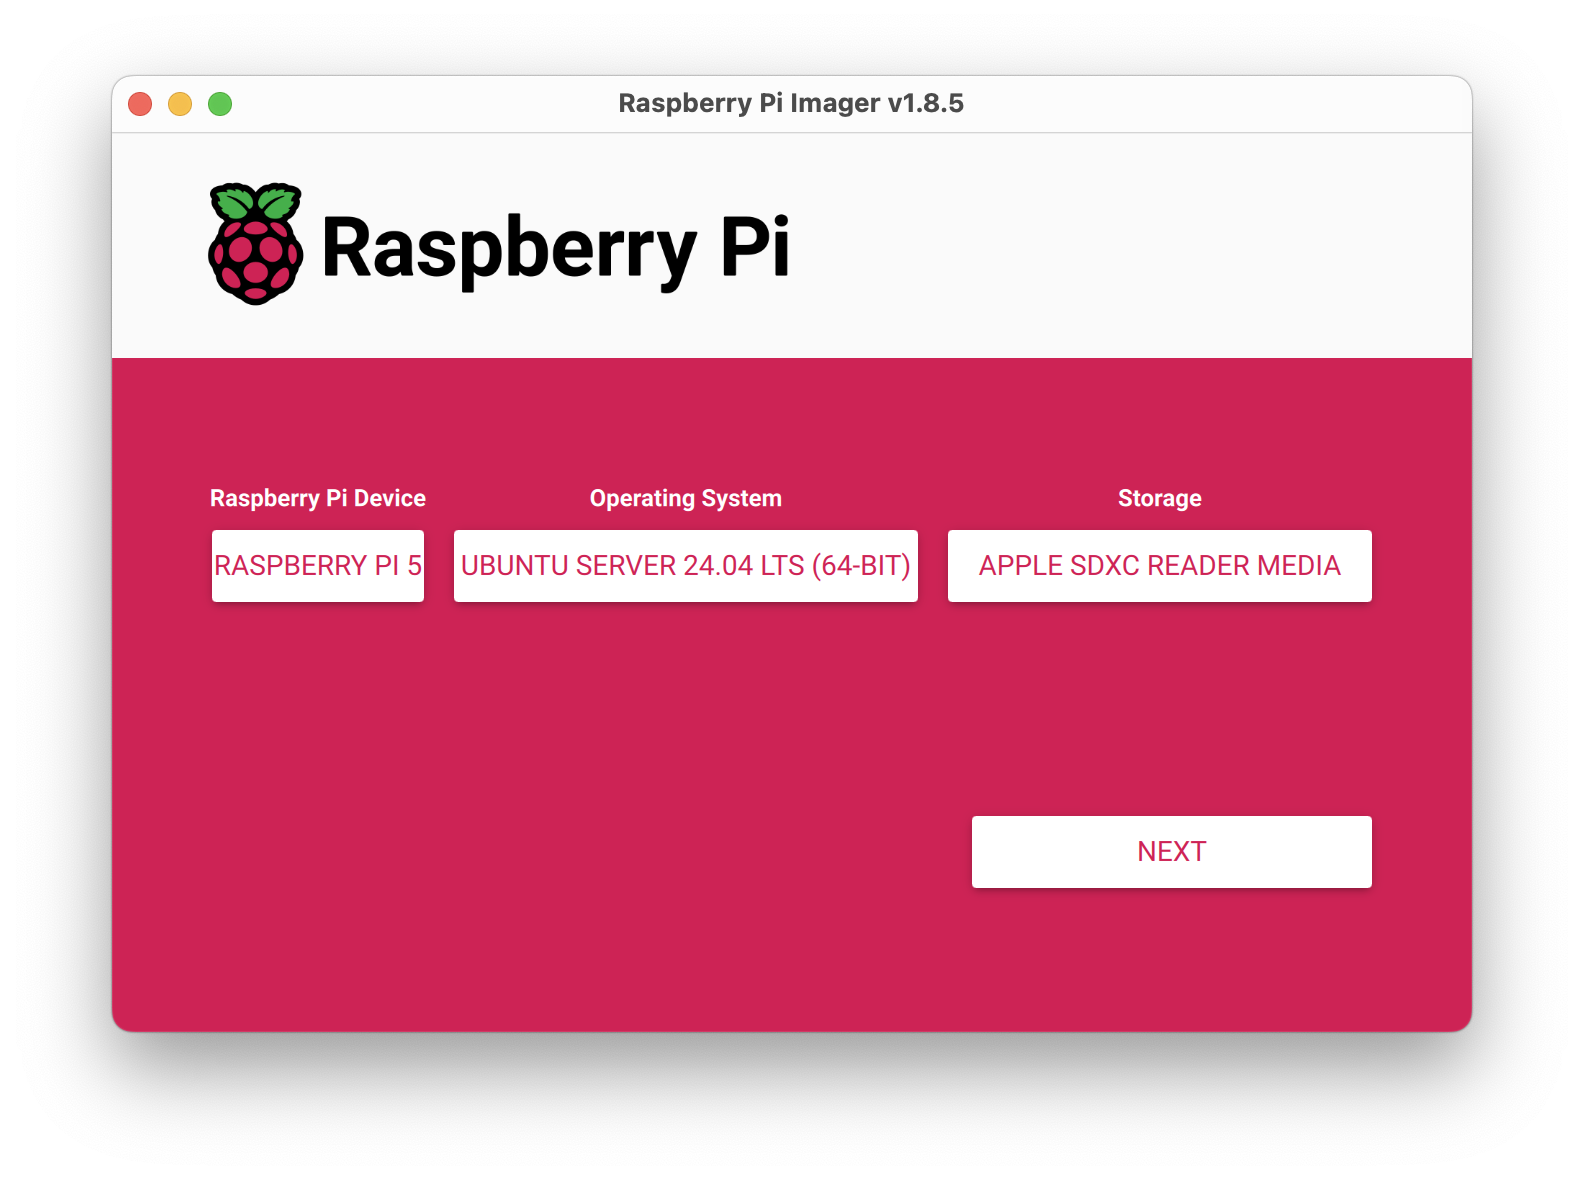
- click "Next"
- you will see the following dialog:
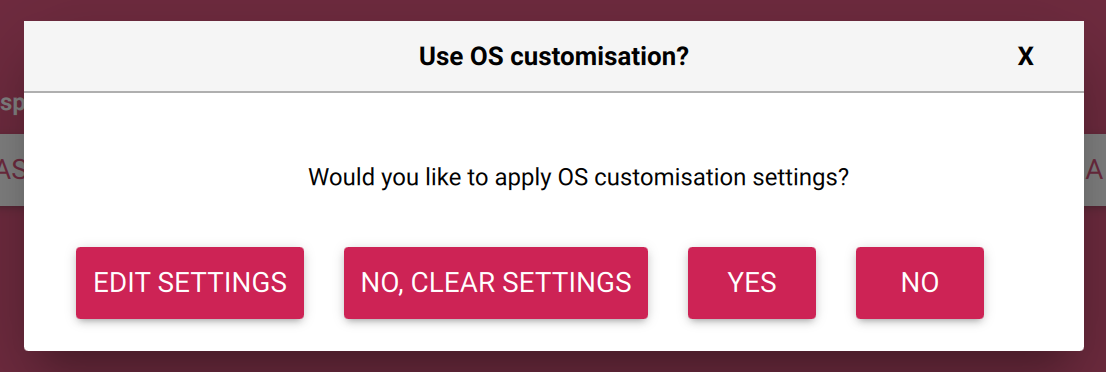
- click "Edit Settings"
- you will see the following:
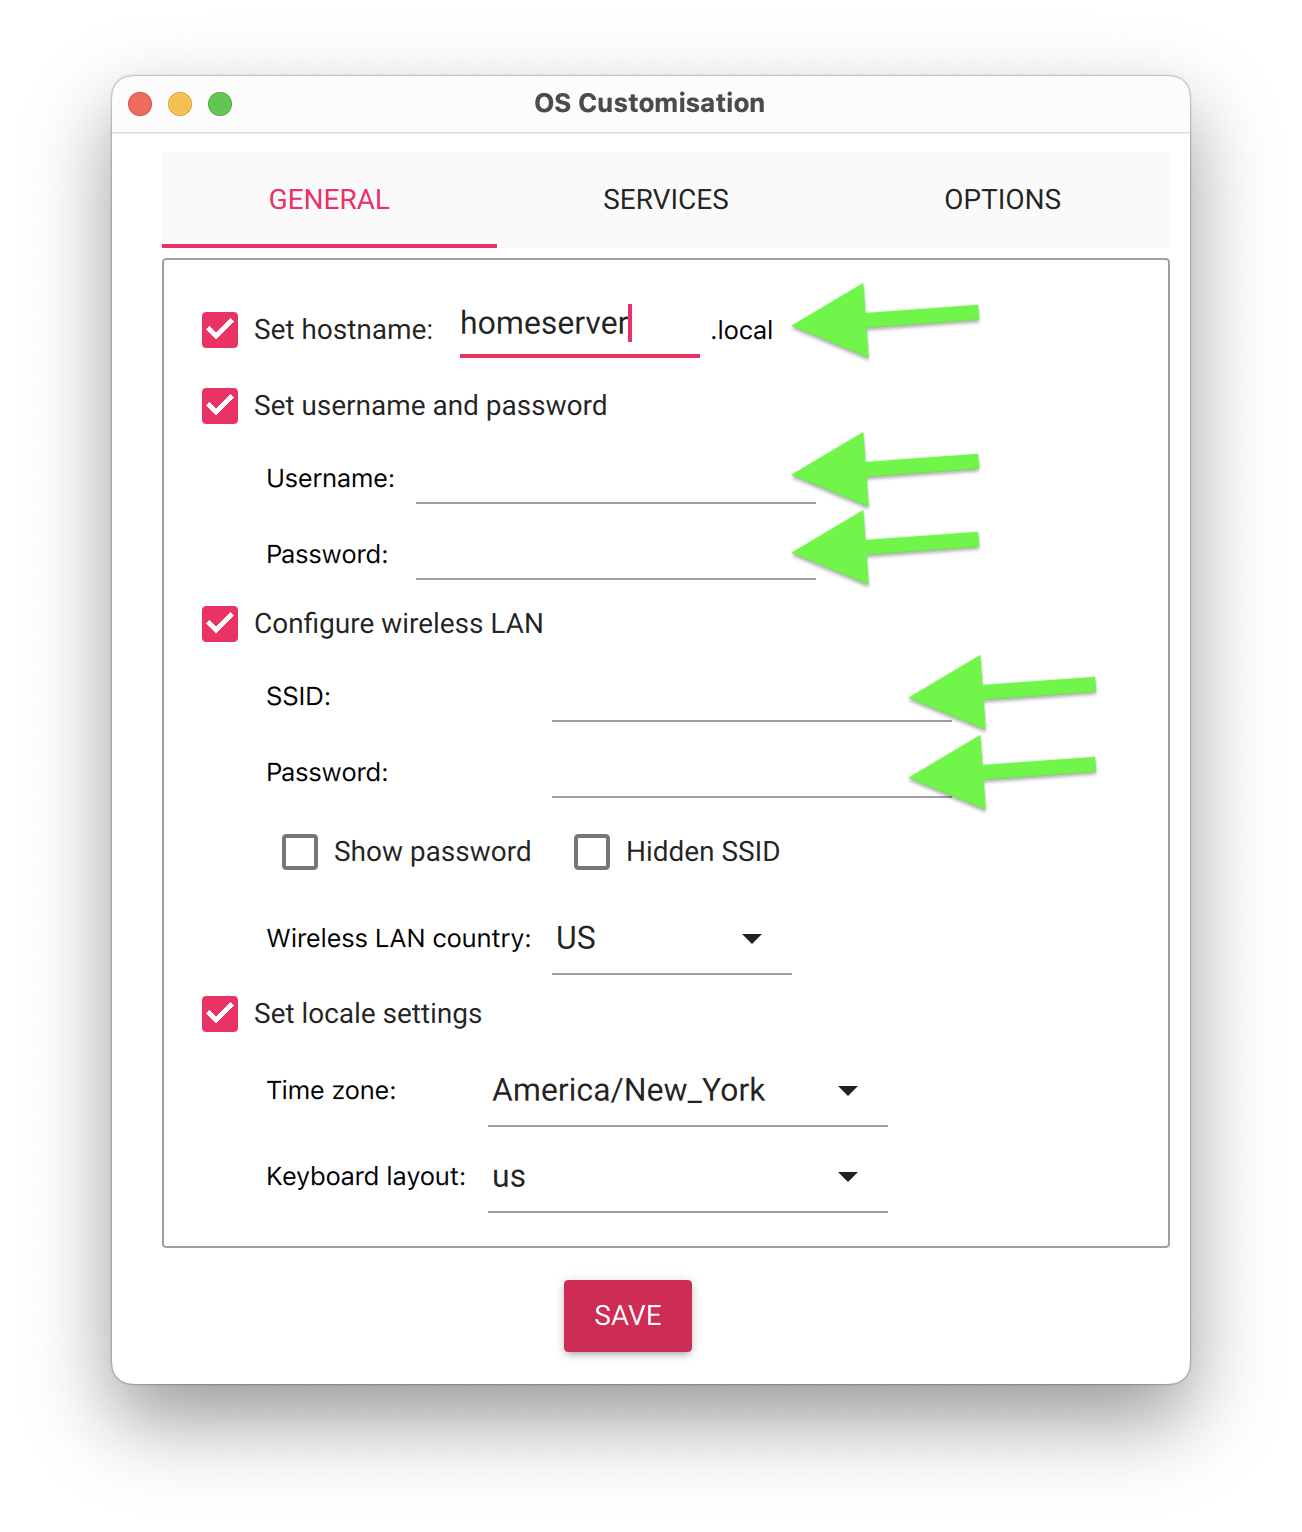
- in the "General" tab pictured above:
- make sure that "Set hostname" is checked. For the "hostname" value, give your Pi a memorable name, such as "homeserver"
- make sure that "Set username and password" is checked. For the "Username" and "Password" values, choose a username and reasonably secure password that you will remember
- if you will be connecting your Pi using Ethernet, skip the next step.
- if you will be connecting your Pi using WiFi, make sure that "Configure wireless LAN" is checked. Set the "SSID" and "Password" values to your home WiFi network's SSID and password.
- go to the "Services" tab
- make sure that "Enable SSH" is checked and "Use password authentication" is selected.
- click the "Save" button at the bottom of the window
- when you're back at the "Use OS customisation?" window, click the "Yes" button
- confirm that you want to erase the microSD card by clicking "Yes"
- you might be asked for your user's password to continue
- wait for the process to complete, it will take a few minutes
- Remove the microSD card from your computer and insert it into the Raspberry Pi.
- Insert the Raspberry Pi into its case (if applicable), connect the fan from the case to the Pi (if applicable), connect the Ethernet cable into the Pi (if applicable), and connect the power supply to the Pi.
- To check that the Pi is working, in your terminal, run:
ssh USER@HOST.local
Replace USER with the username you chose and HOST with the hostname you chose. You will be asked for the password you chose.
- You might be asked to accept the fingerprint of the server. Type "yes". If you're able to log into the Pi, this confirms that the Pi is online and that your username and password work! Close the ssh session by typing
exitand pressing enter. - We're about a third of the way done! If you need to, take a break.
Cloudflare Setup
- Create a free Cloudflare account at cloudflare.com.
- If your domain has already been purchased at another domain name registrar (such as PorkBun, Namecheap, etc.), follow these instructions to add your domain to Cloudflare.
- typically, the steps are to add the domain to your Cloudflare account, make sure to copy all of your existing records (i.e., A, CNAME, MX, TXT etc.) to Cloudflare, and then change your domain's nameservers to Cloudflare's nameservers. And then wait, typically an hour or sometimes more, until this information has propagated across the Internet.
- If you don't have a domain yet, you can buy one through Cloudflare. Go to your Cloudflare dashboard, open the "Domain Registration" section on the left sidebar, click "Register Domains" and follow the steps
Cloudflare Tunnel Setup
- In your Cloudflare dashboard, click "Zero Trust" in the left sidebar
- You will be asked to choose a team name. Choose any name you like.
- You will be asked to pick a plan. Pick the Free plan.
- Click "Proceed to Payment". A credit card will be required from you, however you will not be charged.
- Click "Purchase". Once again, you will not be charged.
- In the "Zero Trust" dashboard, on the left, click "Networks". You should now be in the "Tunnels" section.
- Click "Add a tunnel"
- Make sure that the "Cloudflared" connector is selected. Click "Next"
- Name your tunnel. For example, you could name it "homeserver". Click "Save tunnel"
- Depending on your computer's operating system, you will be shown a snippet of code (either for Windows, Mac, Debian, etc.). Don't do what Cloudflare tells you to do here. Instead, copy this snippet of code by clicking it.
- In the example below, you would click the snippet beginning with
brew install cloudflared && ...: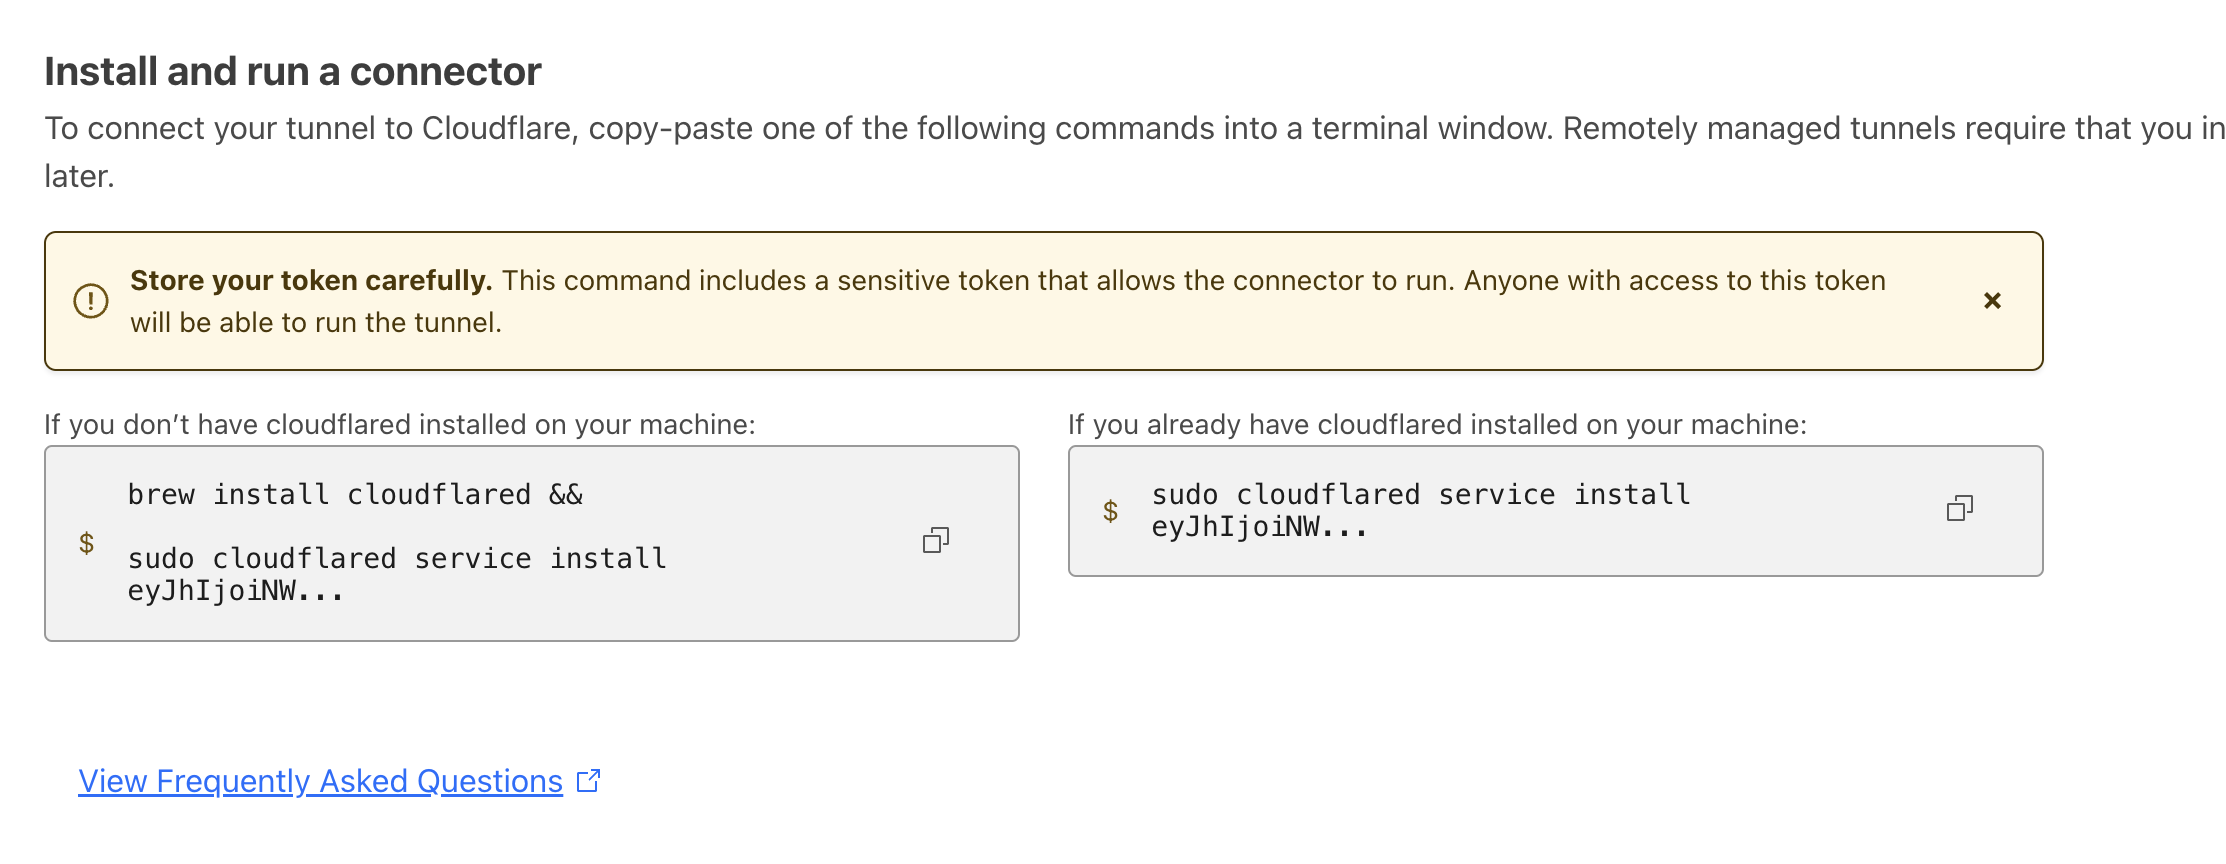
- In the example below, you would click the snippet beginning with
- Paste the snippet of code into a text editor (again, instead of running what cloudflare wants you to run... disco will take care of that part automatically, later).
- Part of the snippet you pasted will contain a long string of text. This is the token that you will need to setup your server. Keep this token around for the next steps.
- Scroll down on the page and click the "Next" button
- You will see a section called "Add public hostname for ..."
- Under "Subdomain", type a subdomain you want to set for the server. It could be "homeserver"
- Under "Domain", pick one of the domains that you are managing through Cloudflare.
- Leave "Path" empty
- Under "Service Type", pick "HTTP"
- Under "URL", type
disco-server - The tunnel configuration should look like this:
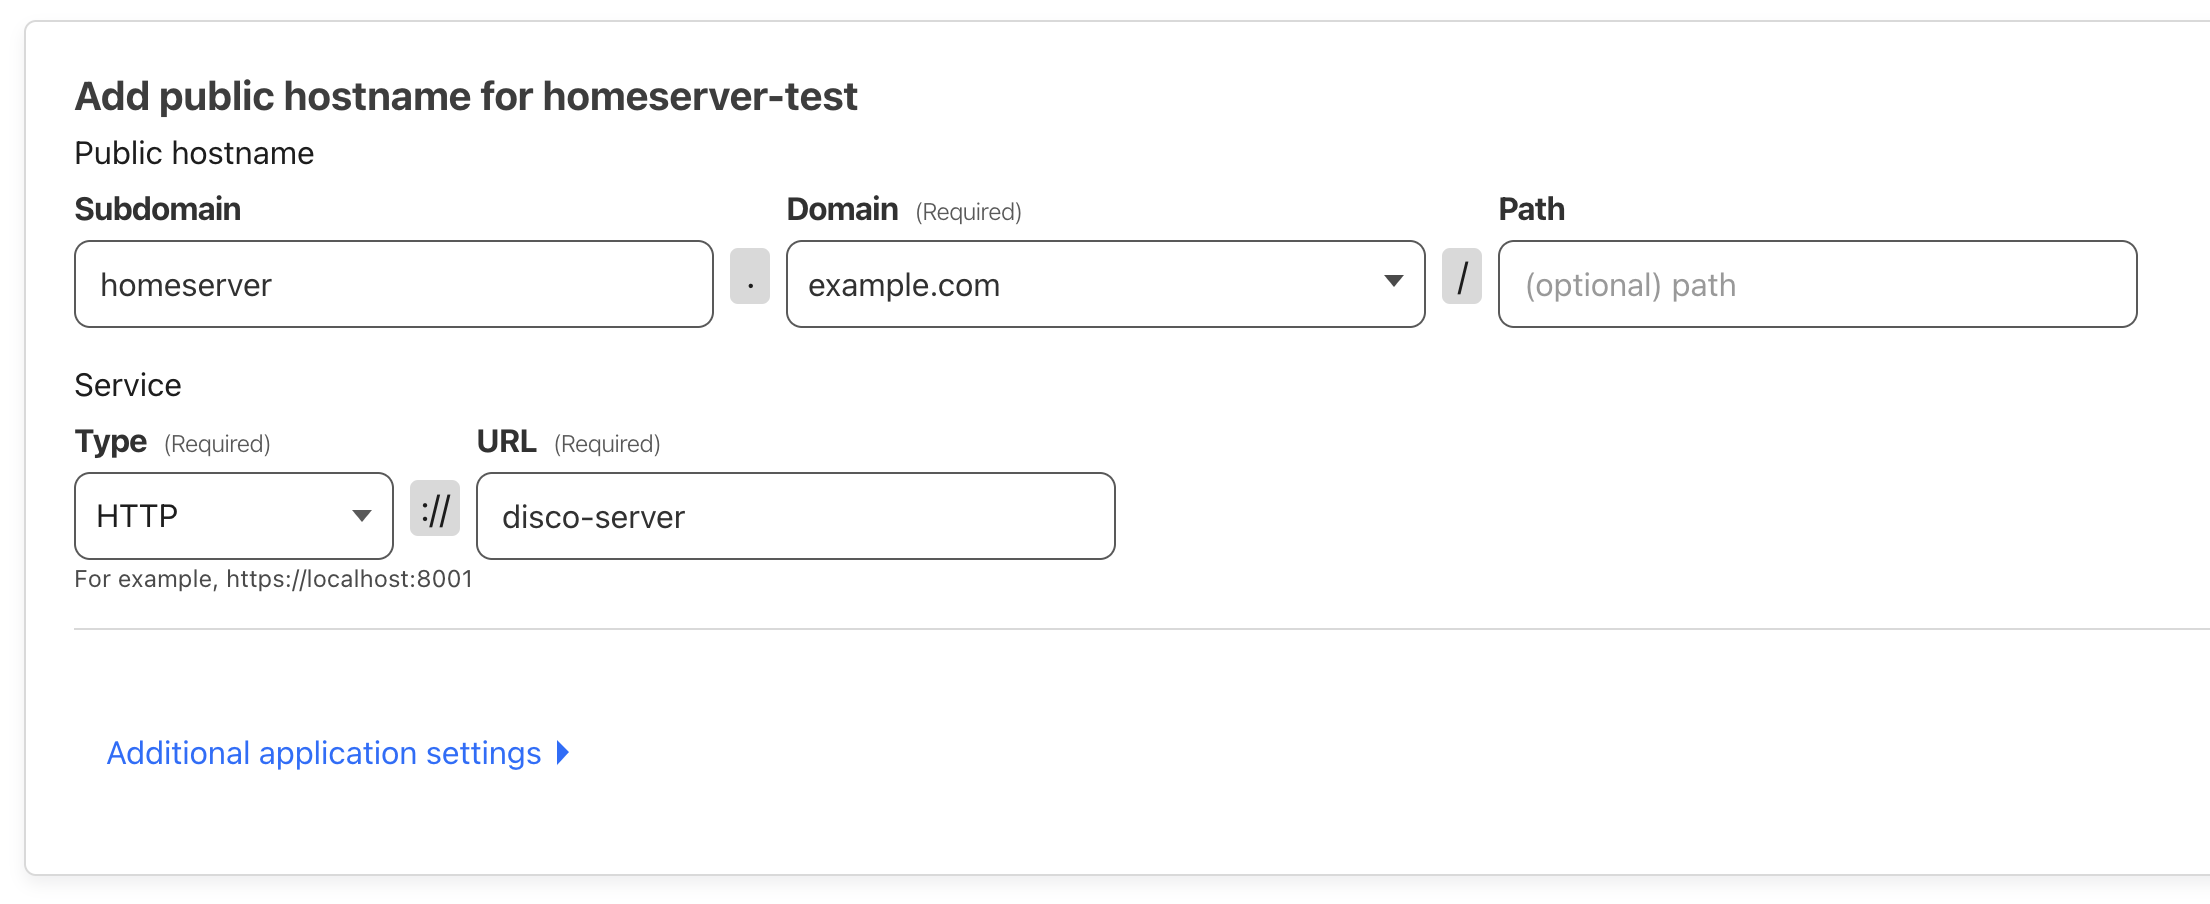
- Click "Save tunnel"
- We're now about two-thirds of the way done! If you need to, take a break.
disco Setup
- You now have the Raspberry Pi and Cloudflare set up!
- We will now use the CLI to install the disco daemon on the Raspberry Pi. To do so...
- On your computer (not on the Pi!), install the disco CLI by following these steps.
- The simplest and fastest way is to run
curl https://cli-assets.letsdisco.dev/install.sh | sh
- The simplest and fastest way is to run
- Once you have the disco CLI installed on your computer, run (again, on your computer):
disco init USER@HOST \
    --host TUNNELDOMAIN \
    --cloudflare-tunnel TOKEN
- Replacing:
USERwith the username you chose for the Raspberry PiHOSTwith the hostname you chose for the Raspberry Pi- this will be something like
myhomepi.local
- this will be something like
TUNNELDOMAINwith the subdomain you set up in the Cloudflare tunnel- this will be something like
mypi.mydomain.com
- this will be something like
TOKENwith the token you copied from the Cloudflare tunnel setup
- disco will ask you for your Raspberry Pi account password. Enter it.
- If you see an error that's about "Failed to run command over SSH" and it includes the text "It is held by process 1990 (unattended-upgr)", this is because the Raspberry Pi is currently updating. Wait about 5-10 minutes and try again.
Deploying projects
- At this point, your Raspberry Pi is a disco server, and you can start deploying your web projects to it!
- To deploy a project, you will need to setup the project's domain name in the same Cloudflare Tunnel you created before:
- In the Cloudflare dashboard, click "Zero Trust"
- Click "Networks". You will be in the "Tunnels" section
- Find the Tunnel you created previously, and in the three dots menu on the right side, click "Configure"
- Click the "Public Hostnames" tab at the top
- Click "Add a public hostname"
- Under "Subdomain", type the subdomain you want to set for the project. For example, "myproject" or "blog". This will be the subdomain that users will use to access your project on your domain.
- Under "Domain", pick one of the domains that you are managing through Cloudflare.
- Leave "Path" empty
- Under "Service Type", pick "HTTP"
- Under "URL", type
disco-server - Click "Save hostname"
- You can now follow any disco Deployment Guide such as: Flask, Node, etc. When running
disco projects:add ..., as the domain for the project, use the domain you just set up in the Cloudflare Tunnel i.e. "blog.example.com"- Don't forget to run
disco github:apps:addto connect your Github account to disco, so that you can deploy projects from Github.
- Don't forget to run
- Congratulations! You're done!